

Looking for a fresh, meaningful way to decorate your walls? Say goodbye to generic posters and mass-produced prints — and say hello to handcrafted basket wall art.
This guide will walk you through how to create a stunning DIY basket wall collage, featuring authentic, artisan-made woven baskets from Zen Designs Arts & Crafts. It’s the perfect mix of natural texture, global design, and personal expression.
🌿 Why a Basket Wall?
Woven basket walls are more than just trendy — they bring warmth, culture, and story into your space. Every basket from Zen Designs Arts & Crafts is handcrafted, many inspired by traditional Kenyan designs and global artisan methods. Displaying them isn’t just about decor — it’s about celebrating heritage and craft.
🛠️ What You’ll Need:
A blank wall space
A mix of woven baskets (varied sizes, colors, patterns)
Lightweight nails, adhesive hooks, or wall-safe tape
Kraft paper (optional, for layout planning)
Measuring tape & pencil
🪜 Step-by-Step: How to Create Your Basket Wall Collage
Step 1: Identify Your Space
Start by choosing your wall. Measure the area you want to decorate and take note of how the space is used — where people sit, walk, and view the wall from. This helps guide how many baskets you’ll need and how they should be arranged.
Step 2: Choose Your Baskets
This is where the magic happens. Select a variety of baskets that complement each other. Go for a mix of:
Sizes (large to small)
Tones (neutrals, bolds, warm earthy colors)
Patterns (geometric, solid, textured)
All baskets featured in this collage are from Zen Designs Arts & Crafts, where every piece is a handcrafted original.
Step 3: Plan Your Layout on the Floor
Lay your baskets out on the floor to experiment with placement. Start with your largest basket in the center — this acts as the visual anchor. Then build outward, alternating between sizes and shades for visual interest.
Pro tip: Squint your eyes while looking at your layout — it helps reveal imbalances or clustering.
Step 4 (Optional): Trace & Tape
Want to be precise? Trace each basket on kraft paper, cut the shapes out, and tape them to the wall. This mock layout helps you fine-tune spacing and symmetry before making any holes.
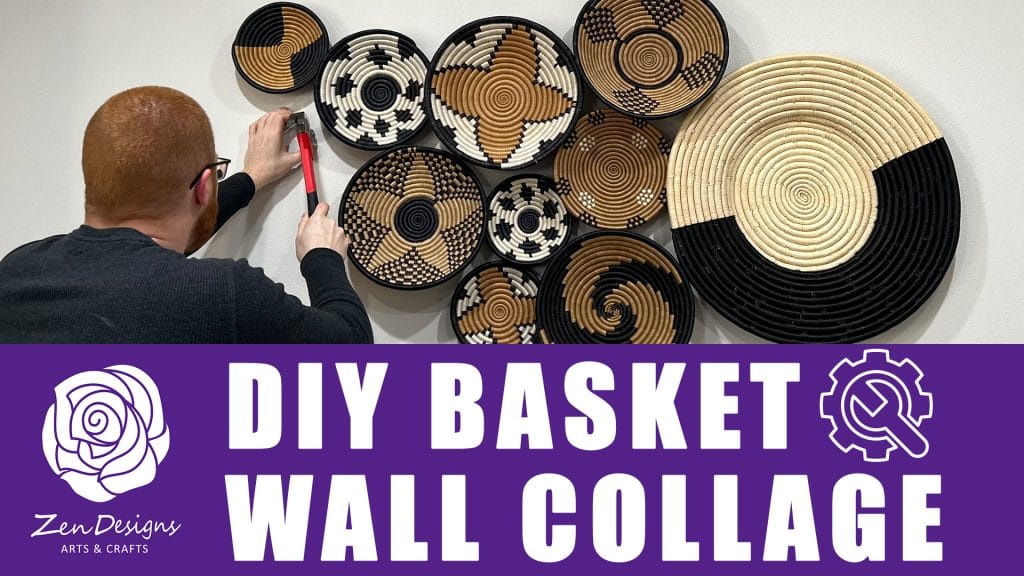
Step 5: Hang Your Baskets
Use nails, hooks, or wall-safe adhesives based on your surface and basket weight. Hang each basket by its loop or weave. Step back after each one to check balance and flow.
Step 6: Enjoy the Reveal
Step back and take in your handcrafted wall art — you’ve created a one-of-a-kind focal point filled with texture, craftsmanship, and personality.
💡 Pro Styling Tips:
Stick to odd numbers for a more natural arrangement
Leave uneven gaps between baskets for an organic look
Mix materials with a few neutral pieces to balance bold patterns
🛍️ Ready to Start Your Own?
You can shop these exact baskets (and more artisan treasures) at
👉 ShopZenDesigns.com
Each piece is ethically sourced and handmade, bringing culture and creativity straight into your home.
❤️ Let’s See Your Creation!
Tag us @ZenDesignsArtsCrafts on Instagram or drop a comment below with your basket wall! We love seeing how you bring these handcrafted pieces to life.